 The Multi Chine Proa
Concept - Plans - Pics - Rig - Sail - Details - Sail test
Basic Concept
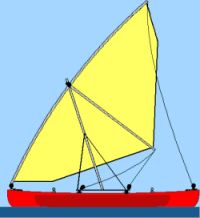
The conception of the P5 is a light car toppable proa for 1 to 2 sailors. Both hulls are multi chine designed for plywood/epoxi (stich&glue) building. The total weight should be 70-75 kg. The basic idea of the boat are borrowed from Gary Dierkings strip planked TARAWA. See also  Garys homepage.
Cutting Plans
The main hull has three parts: lee plank, luff plank up and luff plank down. Every plank could made from mirrored halfs from 4mm plywood. Next step is to glue a stringer (20x20mm) along the upper edge of the lee plank (may be a second one into the middle) and of the upper luff plank for fitting the decks later. Annother stringer should fixed at the below edge of the upper luff plank. For more stablity use a keel batten (20x20 mm) as backbone. Then the traditionary holes through the below edges of the lee plank, keel batten and below luff plank.
! Please pay attention: All cutting plans and instructions are only proposals!
Building Pictures
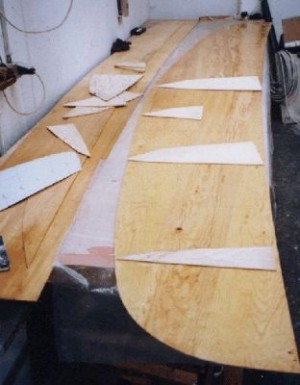
Cutted planks with bulkheads
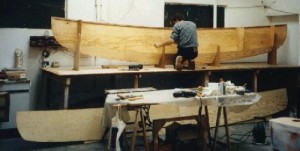
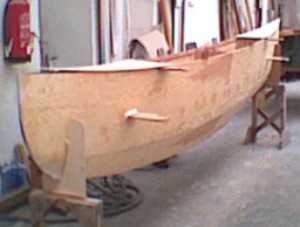
Main hull set into the support. Its useful to build the support very strong, because the multi chine hull is before gluing very instable.
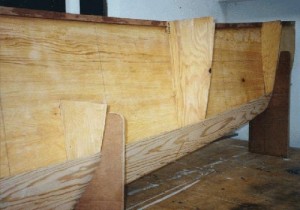
At first the put the lee plank into the support, than the keel and the below luff plank. Than stich all together with copper wire. If all is perfect arranged glue it together with epoxi putty/glue. After the glue has dried strengthen the keel section
and the connection of the luff planks with stripes of 200 gr fibre glass.
Is the hall stable, you can insert the cockpit floor and the beam fittings. Pay attention to the paddle fittings. The should be match to the paddle (length/diameter) you want to use later (if you buy ready ones).(See details).
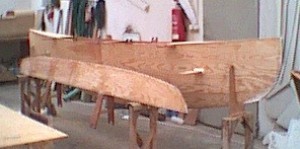
At last you fit the small decks and the wood poles for the webbings between the beam fittings. Now all wood work has finished and you can start with sanding the surface ...
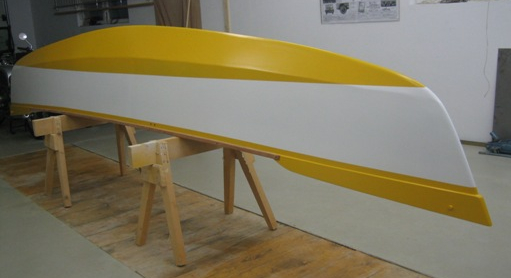
Analogue to the main hull (vaka) build the ama. Here it's more simple because the hull is symmetric and it straighten itself after putting the bulkheads in.
Cutting plan for the Ama.
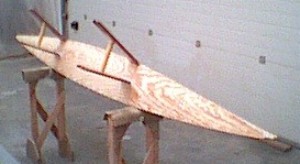
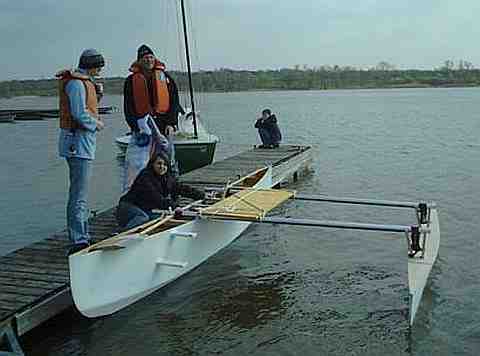
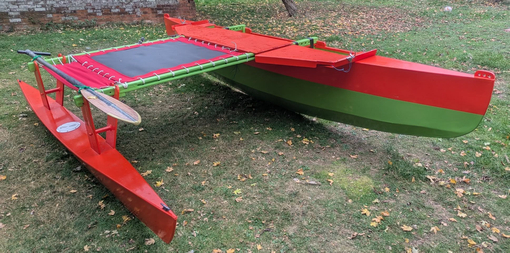
Ama ready for sanding and coating. Here you see very clearly the arrangement of the poles between the beam fittings. (See details).
The rig functions like a seesaw. With changing the bow after shunting you pull down the yard with the sail to the new bow.
Fine demonstrated is this rig at the homepage of Gary Dierking or in the Gibbons-Special at multihull.de. This Gibbons/Dierking rig has a simpler handling in opposite to the Crab Claw sail. Also you should do easier maneuvers at the overcowded lakes here (Remark: This I thought before I tried it in reality. See 'sailing experiences' below).
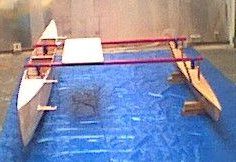

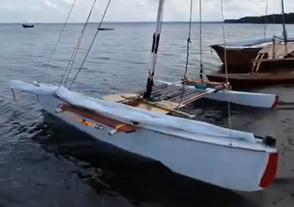
For the first time both hulls are fittet with the surf mast beams and with the 'test' sail made of polytarp.
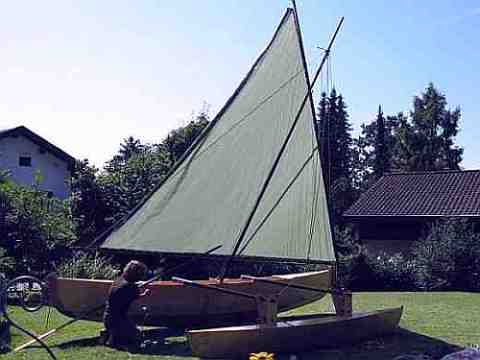
Rig
Sail
The sail of the Gibbons/Dierking rig has the advantage (like the Crab Claw) that no shaped camber is need, so you can cut it simply by yourself. I used a white standard polytarp like you can get here in homeworker shops, a double glued tape like you use for carpet and for protect the overlapping parts a special repair adhesive tape.

Detail Views
- Arrangement hulls
- Beam fittings, Webbing
- Construction - Paddle fittings
- Yard connection (today out of date, because no bamboo was used. Used surf masts are cheaper in Germany)
Additional thougths to the GD rig (Gibbins/Dierking)
In meantime there are some other P5 built:
 Retho Brehm
 Manfred Meier
 John Coffin
 Mariusz
 Peter Schuhmayer
Disclaimer
The plans of the P5 are free for building a boat for private use. Commercial replication is not allowed. For rightness of all plans and advices are no guaranty is given. Most parts in this descripton have only a character of proposal and must be verified by the builder himself. Be creative and courageously - and you can sail a P5 like me!